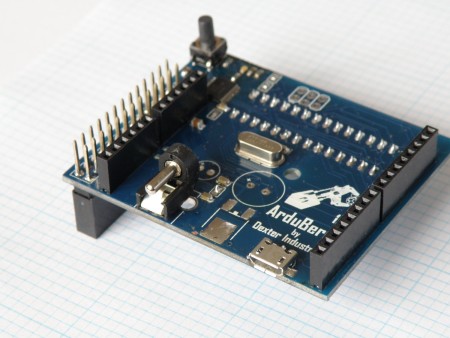
The Arduberry is an Arduino that sits on top of a Raspberry Pi. It connects to the GPIO pins. You can’t see it in the photo, but there is a MEGA328P chip mounted on the bottom of the board. Functionally it works the same as what would happen if you were to hook an Arduino Uno to a Raspberry Pi using a USB connection. By running software like Firmata on the Arduberry and appropriate libraries on the Raspberry Pi, you can send information between the Arduberry and Raspberry Pi.
So why would you want something like this? There are many shields and sensor libraries available for the Arduino family. Also the Arduino provides analog, digital, and PWM pins while the Pi only has digital pins and a single PWM pin. On the other hand, the Pi has significantly more processing power, audio input and outputs, and allows you to use programming languages that aren’t available for the Arduino. For example you could run Scratch, Java, Python, or Racket on the Pi and use it to control the Arduino.
By default the Arduberry is powered by the Raspberry Pi and since it sits on top of the Pi, it has a nice small form factor. The downside is that if you want to use the Pi to upload programs to the Arduberry, you have to be aware that it uses pins 11 and 13 to accomplish this. So if you have anything plugged into pins 11 or 13, when you try to send a new program to the Arduberry, you’ll get an error like this:
avrdude: The AVR device is not responding
avrdude: initialization failed rc=-1
Double check connections and try again, or use -F to override this check.
So for example if you try to use something like an Arduino Motor Shield that uses pin 13, you’ll have to remove it to upload a different program to the Arduberry. If you have an LED plugged into pin 13, you’ll have the same issue until you remove it.
So the Arduberry can be a good choice when the Arduino code is going to remain fairly static or you don’t need to use pins 11 and 13. If you are needing to make a lot of changes to the Arduino code and have a shield that uses pins 11 and 13, you may be better off with a normal Arduino connected with a USB cable.

